Pendulum Painting Project
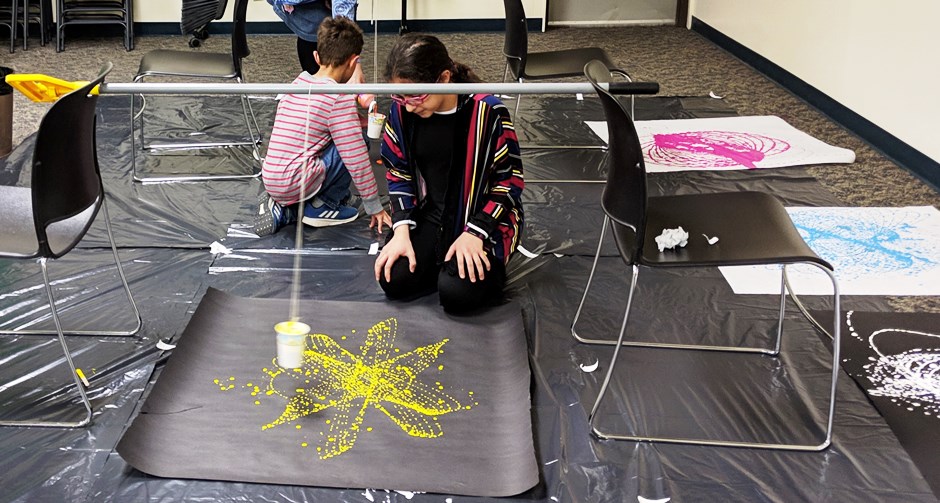
Last year at Sierra View’s STEAM Camp, attendees used the laws of physics to create a set of boldly colored modernist masterpieces. The technique used, called pendulum painting, involves using a swinging object to deposit paint in surprisingly elaborate designs. Before diving into our project, we discussed concepts of inertia, gravity, friction, and momentum.
It was so much fun that we decided to do it again. If you can't join us, use these instructions to try the project at home
Here’s how it’s done: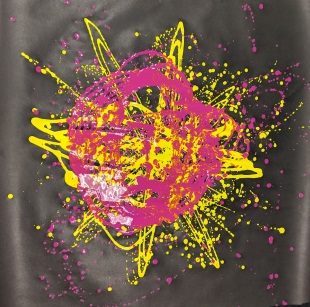
Materials
- Foam or paper cup
- Scissors
- String
- Tape
- Two chairs
- Broom
- Large paper
- Plastic tablecloth or other drop cloth
Instructions
- Prep the workspace by covering the floor with a drop cloth.
- Poke a hole in the bottom of the paper cup and one hole on each side of the cup underneath the rim.
- Tie a piece of string through the two holes on the sides of the cup, creating a handle for the cup.
- Place the broom across between the two chairs and slide the string tied cup to the middle of the broom.
- Test your pendulum with water. This is an easy way to make sure your work space is covered before adding paint. It also allows your artist time to experiment with swinging the cup.
- Once your child is ready, place a piece of tape covering the bottom hole of the cup and fill the cup with a mixture of washable paint and water. It may depend on the thickness of your paint but we used a 2:1 ratio, 2 parts paint to 1 part water.
- Roll out and place your paper underneath the pendulum.
- Remove the tape and swing the cup. Observe the patterns the pendulum creates on the paper.
- Experiment with different timing of swinging the cup, different lengths of string, or lowering and raising the cup.

Find more programs and events for makers on our online calendar of events.